|
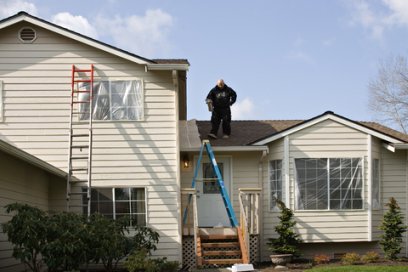
How to Apply Exterior PaintExterior Decorating With Exterior Paint Let’s look at exterior decorating first. I have found this to be one of the most cost effective ways to revive a tired house or home that can add thousands of dollars to the value of a property. Creative use of contemporary exterior paint colors is not beyond the ability of most home owners. As has been mentioned in the house repairs planning section of this web site, taking a little time to think about what you like and the result you want to achieve is important to getting a result that you will be proud of and will give you years of protection to your home that looks great. House painting tips Step 1 Preparation The key to obtaining a successful result with paint is preparation. Thorough preparation will pay dividends and produce a superior result that will look great and will last longer. Stripping back Before stripping the paint back test your paintwork by cutting a small cross with a knife and pressing adhesive tape across the cut then peal it away. If it pulls the paint away then it needs to be stripped back to firm base. Paint areas that are heavily layered will need to be stripped with a heat gun or a chemical paint stripper.Any paint that is in good condition will just need to be washed thoroughly and lightly sanded. Bare timber should be spot primed. Blistering, flaking and peeling Blistering paint will occur where dark paint has been applied over many layers or where moisture is trapped below the paint. The source of moisture should be eliminated, then strip back the blistering paint with a heat gun or a chemical stripper. Crack around windows and doors should be sealed with suitable filler. Painting masonry, bricks and concrete Before painting to bare concrete or masonry. Allow them to cure for a minimum of 28 days. Wipe salty or lime build-up away. Check all surfaces and remove loose material with a wire brush. If the surface is powdery, porous or highly glazed you will need to apply a primer recommended for the material - ask at your Paint Supplier store. Window frames Scrape away any areas of loose paint and feather the edges with medium grade sandpaper. Use a suitable filler to fill any cracks or flaws. Spot prime, sand then wash the whole window frame down to remove all dirt and grime. Galvanised iron roofs, bare metal and spouting Galvanised iron roves and galvanised gutters and down spouts should be checked for corrosion and soundness, any flaking or blistering roof paint should be stripped back. Brush with a wire brush and spot prime any problem areas. Bare metal surfaces should rust free and clean before priming with anti rust primer. Treat any rust areas with a rust remover and wash down with clean water. Wash any metal or plastic guttering. Nail head stains Areas there are old steel nails should be replaced with galvanised nails. Sand or wire brush any stains off the existing exterior paint then countersink the new nails 3mm - 4mm below the surface. Spot prime with a rust guard product and then fill and sand. Timber preparation Bare timber which has exposed to the elements for longer than a month will need to be sanded before applying any paint. Timber that is rotten or decaying must be replaced. Areas around windows and doors where movement is possible should be filled where possible with flexible filler. Step Two Pre-paint coatings Having spent valuable time preparing your surfaces for painting, you now to seal and prime them. Before applying your final exterior paint colors Pre –paint coatings are essential if you want to achieve a superior finish. Surfaces that haven’t been primed or undercoated will not produce a good finish, nor will they last very long. As a general rule, bare timber must be primed with primer. The type of undercoat varies, depending on the surface. If you're not sure what sealer, primer or undercoat to use, have a chat with the friendly staff at your local paint Supply store, they will be happy to help. Be Prepared If you are not sure how much paint you'll need?As a quick guide, 1 litre covers approximately 15 square metres. Step Three – Applying Exterior Paint For the final coats, choose the finish that best suits the material you're coating and the durability you need. Tips For Using A Paint Brush Pre-moisten your brush with the right liquid - water for acrylics, turps for oil based exterior paints. To prevent paint running down the brush handle, don't dip your brush more that 30mm into the paint can. Tap it to remove excess paint. Exterior Gloss: This is shiny, durable - ideal for doors and windows. Withstands harsher cleaning. Exterior Satin: Also called semi-gloss or low sheen. This is a hard working easy clean surface, ideal for woodwork. Surface-by-surface exterior paint guide Weatherboards: Gloss, or semi-gloss paints for long durability.Woodwork: Enhance the natural timbers with a satin or semi-gloss exterior paint finish. Doors and windows: Gloss or semi-gloss enamel exterior paint. Some acrylics exterior paints are suitable, but ask your friendly paint supplier for more advice. Galvanised iron roofs: Use specialised water-based roof paint. Fences: Low sheen water-based exterior paint. Painting in the right order:Work from the top down. Complete the roof, gutters, fascias and eaves, down to walls, doors, windows and baseboards. Paint weatherboards in two stages for fast easy exterior painting. Paint the underside first, then the face. Tips For Cutting In Applicator paint pads are ideal for 'cutting in' around door edges. Handling the paint Thoroughly mixing your paint is vital. Make sure the temperature hasn't dropped below 10°C or the paint won't flow smoothly or set properly.Check the guidelines on your cans for re-coating times. It's important to follow these suggestions, taking into account the temperature, humidity and the type of paint you're using. One heavier coat is not as good as two - it may not dry properly. Remember to never paint over an area that is partially dried. Leave runs and re-sand once dry. Return to the top of exterior-painting. Return to Home-Decorating-Ideas. 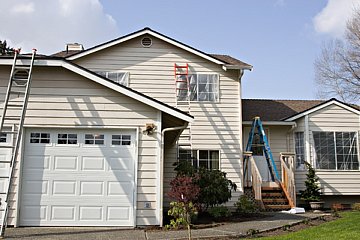
|